What is Google Sketch Up?
Google Sketch Up is a 3D modelling computer program for applications such as architectural, interior design, civil and mechanical engineering, film, and video game design. A freeware version, Sketch Up Make, and a paid version with additional functionality, Sketch Up Pro, is available.
How Do I Use Sketch Up?
There are a lot of 3D software packages around but Sketch Up is defiantly one of the easiest to use.
With a few simple clicks you can create surprisingly good looking 3D models with textures and set up a fly around camera shot to show it off.
For this tutorial we are walking through creating a small house.
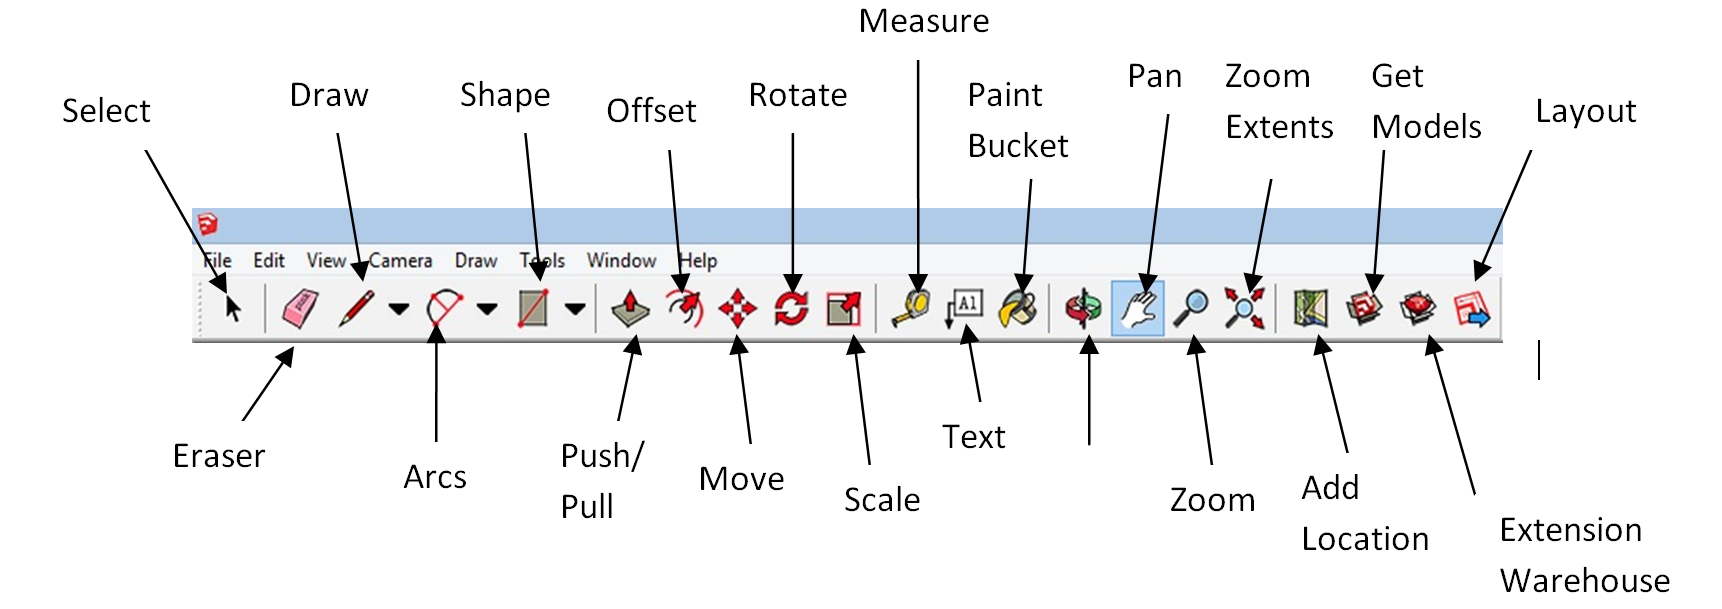
Sketch Up Toolbar:
Creating a New Project:
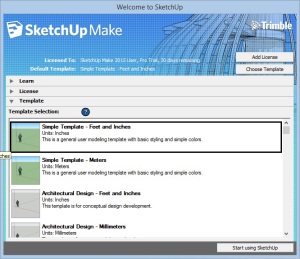
When you first open Sketch Up you will be met with a welcome screen. From here you can access built in tutorials, Up-grade the software’s license or start a new project.
Select a desired template from the list and hit ‘Start using Sketch Up’.
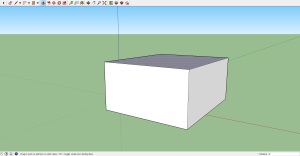
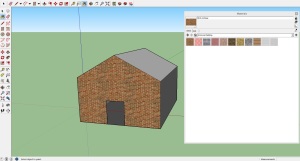
Creating the first structure:
Select the ‘Shapes’ tool from the tool bar and click and drag and square anywhere on the stage floor. This will be the floor of your house.
Then select the Push/Pull too, Click anywhere on the inside of your square and drag upward to create a cube. When you feel the cube is tall enough release the mouse button to set the size.

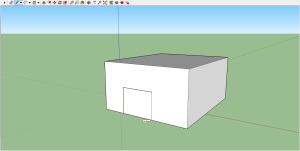
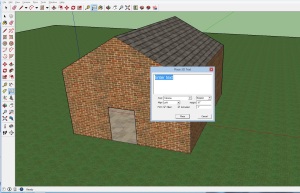
Adding a Doorway:
You can create a simple doorway in two ways. Either by drawing a door onto the wall or by creating a cut-out and adding a solid door in later. For either option select the ‘Lines’ tool and draw a rectangle, starting and ending from the base of your house. Now you can draw more lines to add detail to the door or by choosing the select tool from the tool bar and clicking on the space inside the lines you just drew you can press the delete key to remove it.
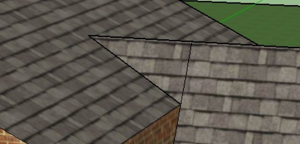
Adding the roof and texture:
to create a basic roof. Select the line tool and draw a line across the top of your house. Then, Using the Move tool, click and drag on the line to create a pointed roof shape.
Adding Colour and texture in Sketch Up is very easy. To start click the paint bucket tool. This will bring up a library of built in textures for you to use. Browse to the ‘Bricks’ folder and choose one of the options by left click on it. Now left click the front of your house to add the texture.
Textures can be added to anything you create, from building’s and furniture to plants and cars.
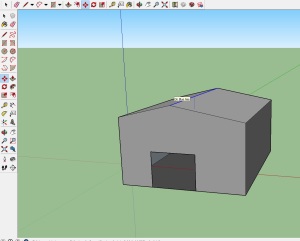
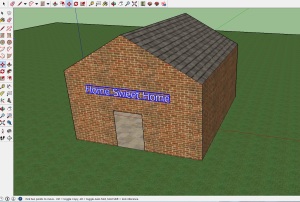
Adding 3D Text:
You can create signs and labels using the 3D text tool. After selecting the tool, enter your desired text and click Okay. Now, by using the drag tool you can move the text anywhere you want. Using this I gave my house a name.
Don’t forget, when typing your text you can change the formatting of it below the text box.
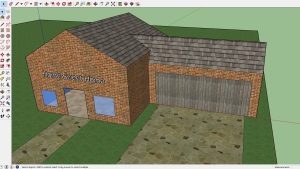
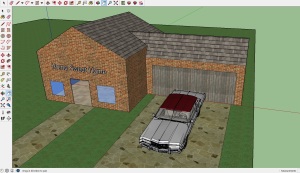
Home Improvements:
Using only what’s been covered above I have improved my house with a garage, driveway and windows.
The garage is just another cube with a roof except this time I need it to join in with my houses roof. By using the line tool I Connected the end of the garage with the middle of house and from there back down to the edge of the garage roof to create a triangle. When this was completed sketch up automatically filled the triangle, allowing me to add more roof texture.
For the driveway I drew out two rectangle and added a stone slab texture.
For windows I drew two squares, this time using the line tool and filled the space with a transparent blue glass texture.
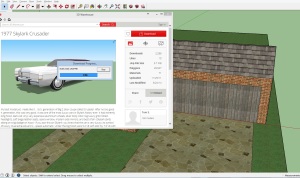
Using the Asset Library:
The Sketch Up Asset Library contains thousands of models created by other people. these can be quickly downloaded and placed into your own Sketch Up projects to add some flair.
No home is complete without a car so I found this 1977 Crusader and added it to my project simply by clicking the Download button in the Library.
When you download a model from the library it will most likely first appear to be quite large or small. To change any models size, first select it and then click on the Scale tool. Now click on any of the corners of the selection box and drag to resize.
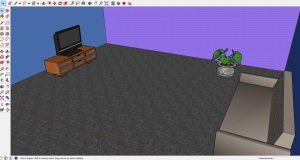
Don’t go forgetting the interior.
Congratulations on building a simple house in Google Sketch Up! Using these simple processes you can create anything, from your own furniture and small objects to exterior decoration and large structures.