27 years of trusted school IT support across Hertfordshire and Buckinghamshire

Category: Office365

  • How to setup an Office365 email on iOS

    How to setup an Office365 email on iOS

    NOTE: There is now an updated guide to setup Office365 using the OWA App. Click Here for instructions.

    1) To setup an Office365 email account on an Apple device, open the “Settings” app

    settings app

    2) From the menu on the left hand side, select “Mail, Contacts, Calendars

    mail and contacts

    3) Select “Add Account” from the sub menu on the right hand side.

    add account

    4) Next you will be presented with a list of various email hosts. It’s a common assumption to select “Outlook.com” at this point, however, select “Other“.

    mail type

    5) Select “Add Mail Account

    add mail account

    6) Now you can fill in some basic email information. The “Name” field is your name, and the “Description” field can be called anything e.g “My School Email”. Once these are filled in, tap “Next” in the top right corner.

    initial details

    7) The next screen requires a little more information.

    • Incoming Mail Server – Host Name: outlook.office365.com
    • Outgoing Mail Server – Host Name: smtp.office365.com

    The “Username” and “Password” fields should be filled in using your email credentials. Once completed, tap “Next” in the top right corner.

    extended details

    8) If everything has been entered correctly, the account should get verified after a few seconds and you will be presented with the screen below. Tap “Save” in the top right corner – your Office365 email is now setup on your Apple device.

    final save

  • Office365 on Android using OWA

    Office365 on Android using OWA

    Microsoft have now introduced an all-in-one app to access your Office365 mail, calendar and contacts. To install and set up on an Android device:

    1. Open the Play Store

    play store

    1. Search for “OWA”. You may see a few different versions, but we are interested in the “Outlook Web App” app.

    search

    install

    1. Download and install the app. Once it’s finished, open OWA.

    owa app

    1. When the app launches, click “continue”

    before you start

    1. Next, sign in with your school Office365 email account

    sign in 1

    1. After signing in initially, you’ll be redirected to the Office365 website to sign in once more to verify the account.

    sign in 2

    1. If the email credentials have been entered correctly, then the app should start contacting the server to load your account into the app.

    contacting

    1. Once successfully connected, your emails will start to sync.

    initialising

  • Office365 on iOS using OWA

    Microsoft have now introduced an all-in-one app to access your Office365 mail, calendar and contacts. To install and set up on an Android iOS device:

    1. Open the App Store

    app store

    1. Search for “OWA”. You may see a few different versions, but we are interested in the “OWA for iPhone” or “OWA for iPad” app depending on what kind of Apple device you are installing it on.

    search

    download

    1. Download and install the app. Once it’s finished, open OWA.

    owa app

    1. When the app launches, click “continue”

    initialise

    1. Next, sign in with your school Office365 email account

    sign in 1

    1. After signing in initially, you’ll be redirected to the Office365 website to sign in once more to verify the account.

    sign in 2

    1. If the email credentials have been entered correctly, then the app should start contacting the server to load your account into the app.

    contacting

    1. Once successfully connected, your emails will start to sync.

    sync

  • Self Password Reset

    There are 2 parts to this article, please refer to part 2 if you have forgotten your password. This will only work if part 1 has been completed.

    Part 1. Update Your Information

    This service allows users to reset their own password for their school E-mail account. This service is not enabled by default.

    If your E-mail has been selected for Self Password Reset you will be prompted to add/update your recovery information.

    IMG1. This is prompted after logging in.

    Please choose atleast 1 method of recovery and select “Set it up now”. Follow the instructions and add your details.

    You can add more than 1 method.

    IMG2. Add at least 1 method of recovery before you are able to sign in.

    A verification code will be sent after adding the information, which will be needed to confirm the details.

    IMG3. Receiving your verification code via E-mail.

    Once you have added the information required on IMG2, Select “Finish”, which will no longer be greyed out, and will log you in.

    Part 2. Forgot your password?

    Follow this section if you have forgotten your password and the self password reset service has been set up.

    Click on “Forgotten my password”, this will take you to another page.

    IMG4. Click “Forgotten my password”

    In the “User ID” field, enter your school email address. Fill in the second field with the characters shown in the picture, or select the audio option to the right and enter the words that are spoken.

    IMG5. Enter your email address and the CAPTCHA characters.

    Choose your method of verification, you will need to access, to get the verification code.

    IMG6. Select your method of verification.

    IMG7. You will receive a verification code to enter

    Once you have received your verification code, go on your web browser and enter the code.

    Now enter a new password to use for your email account. The password will need to be different from previous passwords.

    IMG9. Updating your password.

    Now log in with your new password and start using your account.

    Thanks for Reading.

  • Microsoft Forms for Education

    So just a little over a month ago, Microsoft released it’s latest app, Forms, into it’s ever-expanding array for the ‘Office365 for Education’ platform. MS Forms was developed as a result of feedback (via a form?!) from various educators who were looking for an easy way to collect simple data, produce quizzes and be able to analyse student progress. Initital impressions from users suggests that MS have delivered a neat product indeed!

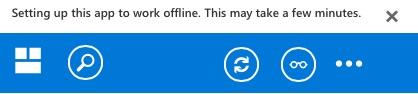
    So let’s take a closer look. Forms is currently still in it’s infancy and hence it’s not yet been fully rolled out. Keep an eye on the “waffle” (that grid of tiny squares in the top corner of Office365) for it’s imminent release:

    waffle

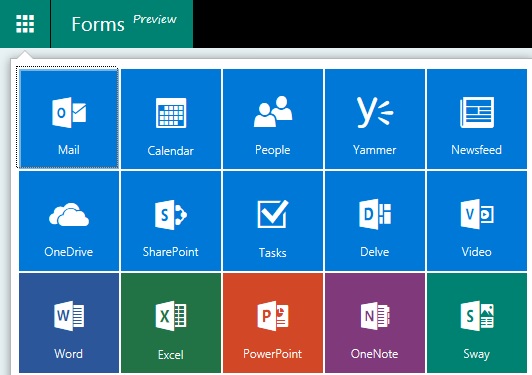
    So until then, users with an education account for Office365 can access forms via it’s preview site: https://forms.office.com

    Once logged in, you are presented with a really clean and very intuitive interface.

    interface

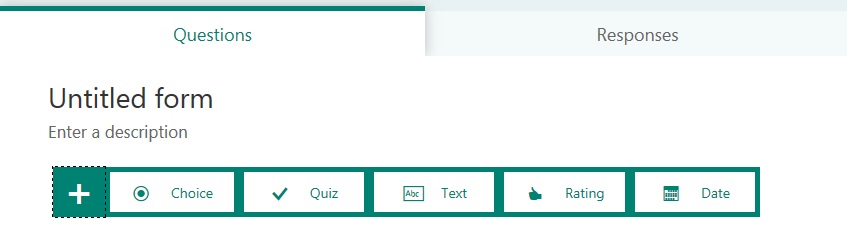
    The design allows for forms/quizzes to be created very easily and within a matter of minutes. There are a few themes to choose from to personalise each form too. Forms can be restricted to either your organisation, or it can be made public. If it’s restricted to your organisation, then users must log into Office365 before they will be allowed to fill out the form. This of course means that the submissions will not be anonymous – though, results are only seen by the creator of the form. Conversely, if the form is set to be public, then users are able to fill in the form without having to log into Office365 and hence the submissions are completely anonymous.

    Forms can be sent to users via a URL, email, QR code or embedded into a website – all of these are auto-generated via the Form itself. Responses are seen instantly by the Forms’ creator, although at this stage there is no email notification to say a response has been received. Instead, the creator needs to log back into the Forms site to see the response. Forms also allows an Excel document to be created with the results. Very handy if users wish to create graphs with the results obtained.

    On the whole, it looks like a very good tool to have as part of the Office365 suite. I can definitely see many teachers adopting it as way of generating some really quick tests for their pupils.

    Although I’ve only had a very quick 30mins with this, there are 2 issues that jump out initially with a form set for public access:

    1. The lack of a Captcha feature – if the form is set to public, the lack of a Captcha will leave the form open to abuse.
    2. The method of tracking responses is via the number of answers, and not the number of users who have submitted.

    Just to illustrate that 2nd point a little further, here is an example.

    response 1

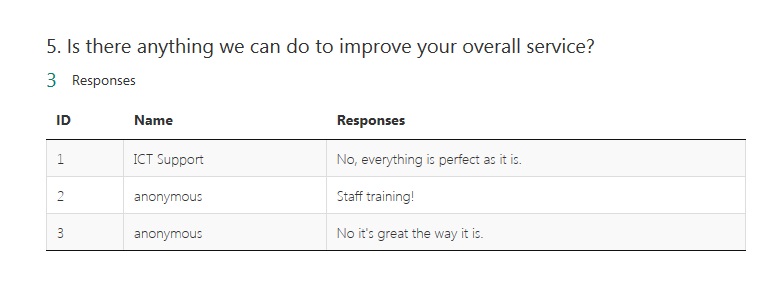
    Above, we can see 3 respondents. The first user “ICT Support” signed into Office365 before opening the form, hence they have no anonymity. The 2 subsequent submissions were done anonymously. One would think the “ID” column represents the order in which they submitted their form. I certainly did…partly because that’s the order I’d done the test submissions in! But then this happened:

    response 2

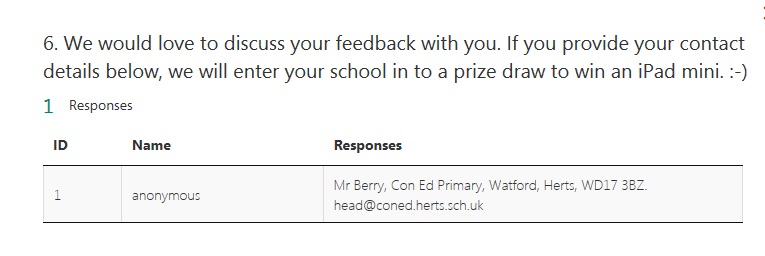
    Question 6 was optional, and only the 3rd user filled the answer in, yet, the ID is shown as 1 and not 3 (as I would have expected). If the ID was based on the user (and not the answer), this would allow tracking the “optional” responses more dynamically. So in this example, Mr Berry had filled out the optional question – if this ID was number 3, then all questions which had answers with ID 3 could have been collated together so that Mr Berry’s overall feedback could be discussed with him.

    If MS can sort these 2 little niggles then I think this would have been a very solid addition to Office365. My test form is at the bottom of this blog for anyone interested in what the embedded form looks like or wanted to have a play too. Anyone who submits the form will be added into the fictional prize draw to win the non-existent iPad mini, too! Good luck!

    https://forms.office.com/Pages/ResponsePage.aspx?id=KyJjVLIioEKrLkqtSEPbXmmhFOxRdbJFrDJljPodADJUNFZBMTJLNzRORDg2QUFMRUpYVlVWM01BNi4u&embed=true

  • How to setup an Office365 email on Android

    How to setup an Office365 email on Android

    NOTE: There is now an updated guide to setup Office365 using the OWA app. Click here for instructions.

    1) To setup an Office365 email account on an Android device, open the “Settings” app

    settings

    2) Scroll down the menu options and select “Accounts”

    accounts

    3) Select “Add Account”.

    add account

    4) Next you will be presented with a list of various account types to setup. It’s a common assumption to select “Outlook.com” at this point, however, select “Email”.

    email account

    NOTE: If you cannot see “email”, select “IMAP” or “Personal (IMAP)”

    5) Now you can fill in some basic email credentials. Once these are filled in, tap “Manual setup” in the bottom left corner.

    set up email1

    6) Select “IMAP account” for the tyoe of email account

    imap account

    7) The next screen 2 screens require a little more information.

    Incoming Server Settings

    incoming server1

    IMAP server: outlook.office365.com
    Security type: SSL (Accept all certificates)
    Port: 993

    The “Username” and “Password” fields should be filled in using your email credentials. Once completed, tap “Next” in the bottom right corner.

    outgoing server1

    Outgoing Server Settings

    SMTP server: outlook.office365.com
    Security type: TLS (Accept all certifcates)
    Port: 587

    The “Username” and “Password” fields should be filled in using your email credentials. Once completed, tap “Next” in the bottom right corner.

    NOTE: If you get a “handshake failed” error after putting in the settings above, use the security type “STARTTLS” on the outgoing server settings, with port “587”.

    8) If everything has been entered correctly, the account should get verified after a few seconds and you will be presented with the screen to select your desired sync interval and frequency. Tap “Next” and finally give your email account a suitable name such as “My school email” and the name you wish to be displayed for sent emails – Tap “Done” and now your Office365 email is setup on your Android device.

    done

  • Record a PowerPoint presentation with audio and video

    Record a PowerPoint presentation with audio and video

    Create your power point

    When complete, click Slide Show > Record from Beginning

    This will now put the presentation into “recording mode”

    When ready, click RECORD in top left corner

    This will start the recording and you can start presenting (including using the annotation pens)

    Click through the presentation until you get to the end

    If you are happy with final presentation, click file > save as > change the file type from PowerPoint Presentation (.pptx) to MPEG-4 Video (.MP4)

    [← Previous post]