How to setup an Office365 email on Android
NOTE: There is now an updated guide to setup Office365 using the OWA app. Click here for instructions.
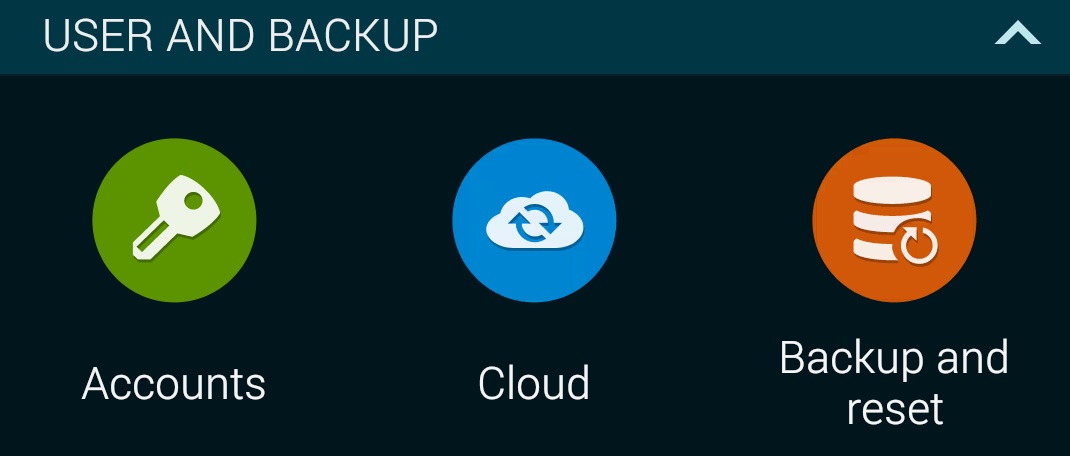
1) To setup an Office365 email account on an Android device, open the “Settings” app
2) Scroll down the menu options and select “Accounts”
3) Select “Add Account”.

4) Next you will be presented with a list of various account types to setup. It’s a common assumption to select “Outlook.com” at this point, however, select “Email”.

NOTE: If you cannot see “email”, select “IMAP” or “Personal (IMAP)”
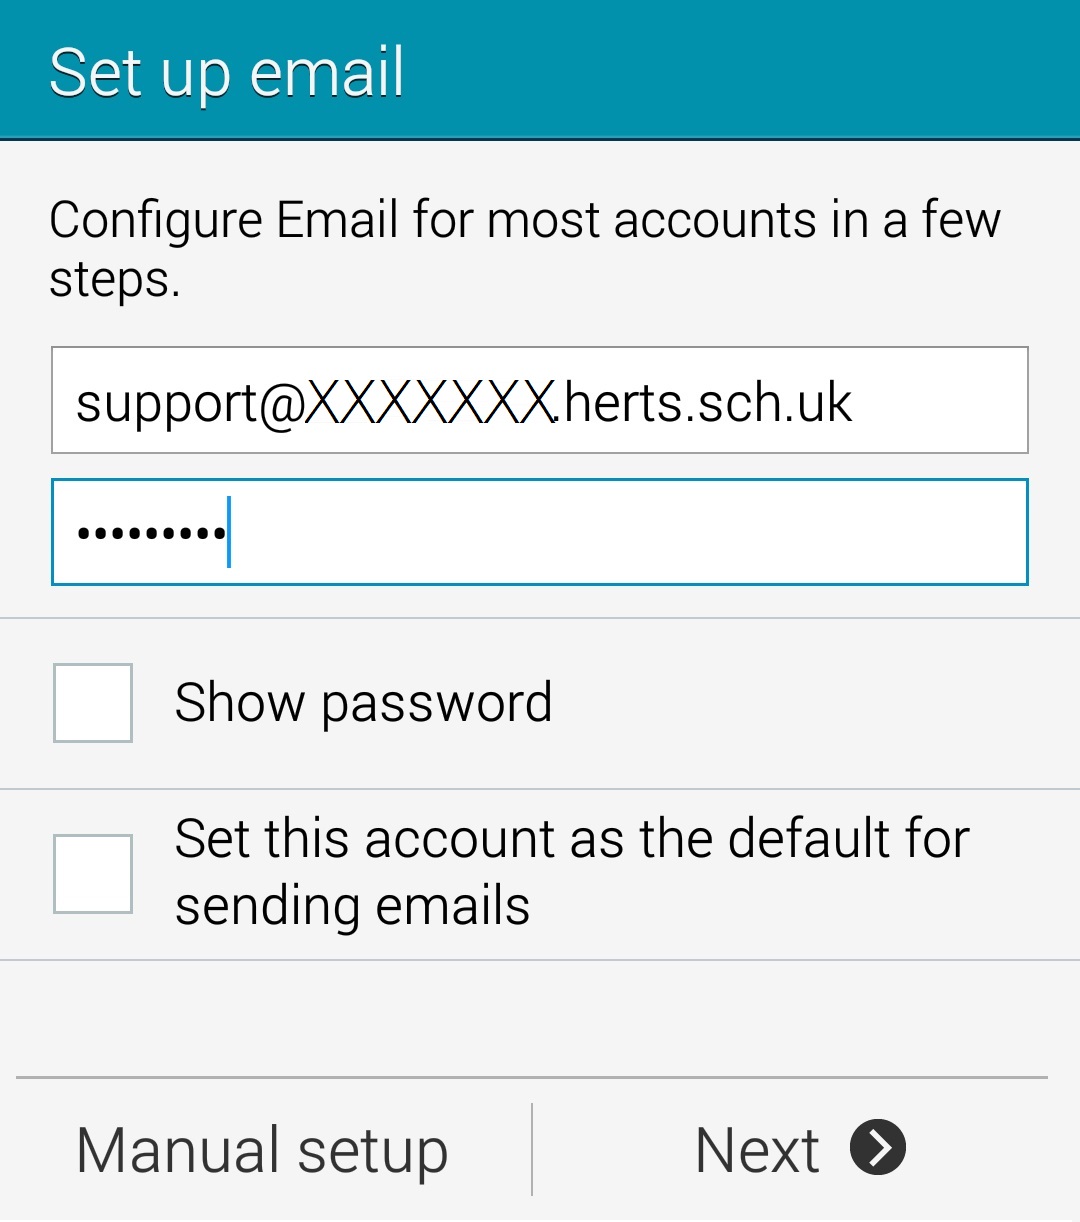
5) Now you can fill in some basic email credentials. Once these are filled in, tap “Manual setup” in the bottom left corner.
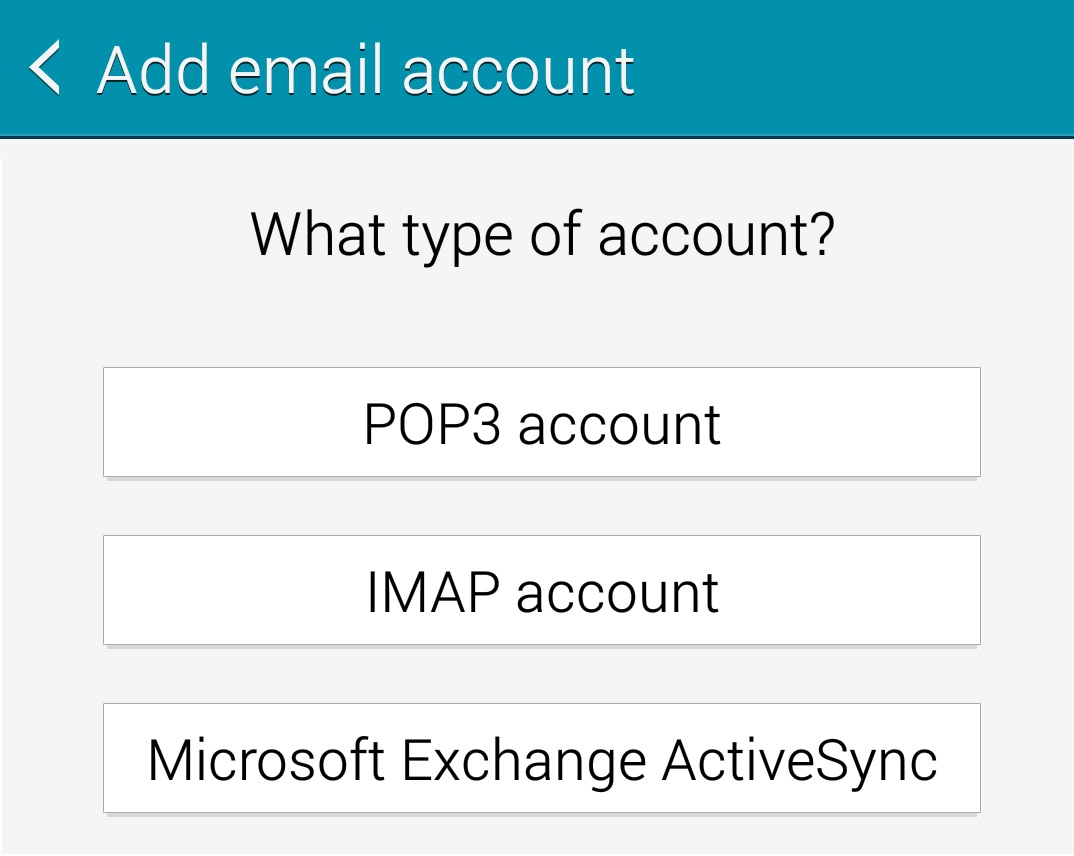
6) Select “IMAP account” for the tyoe of email account
7) The next screen 2 screens require a little more information.
Incoming Server Settings
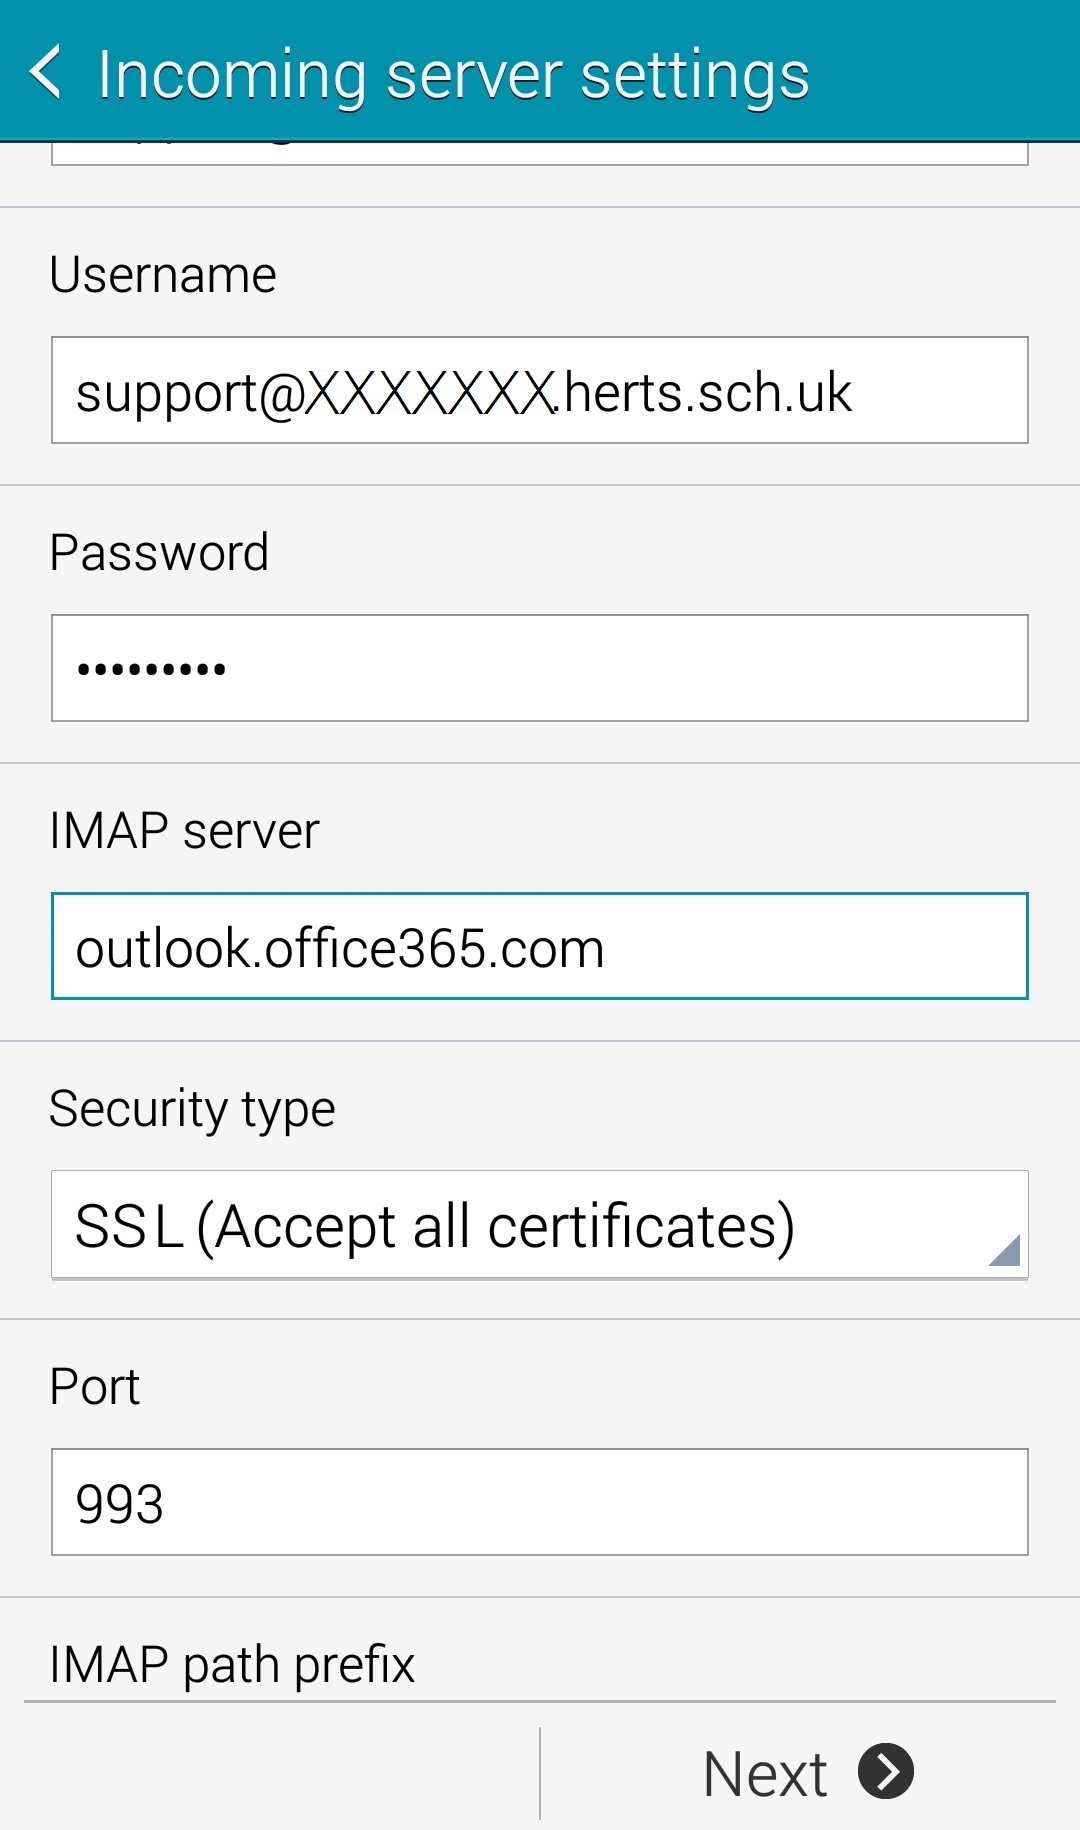
IMAP server: outlook.office365.com
Security type: SSL (Accept all certificates)
Port: 993
The “Username” and “Password” fields should be filled in using your email credentials. Once completed, tap “Next” in the bottom right corner.
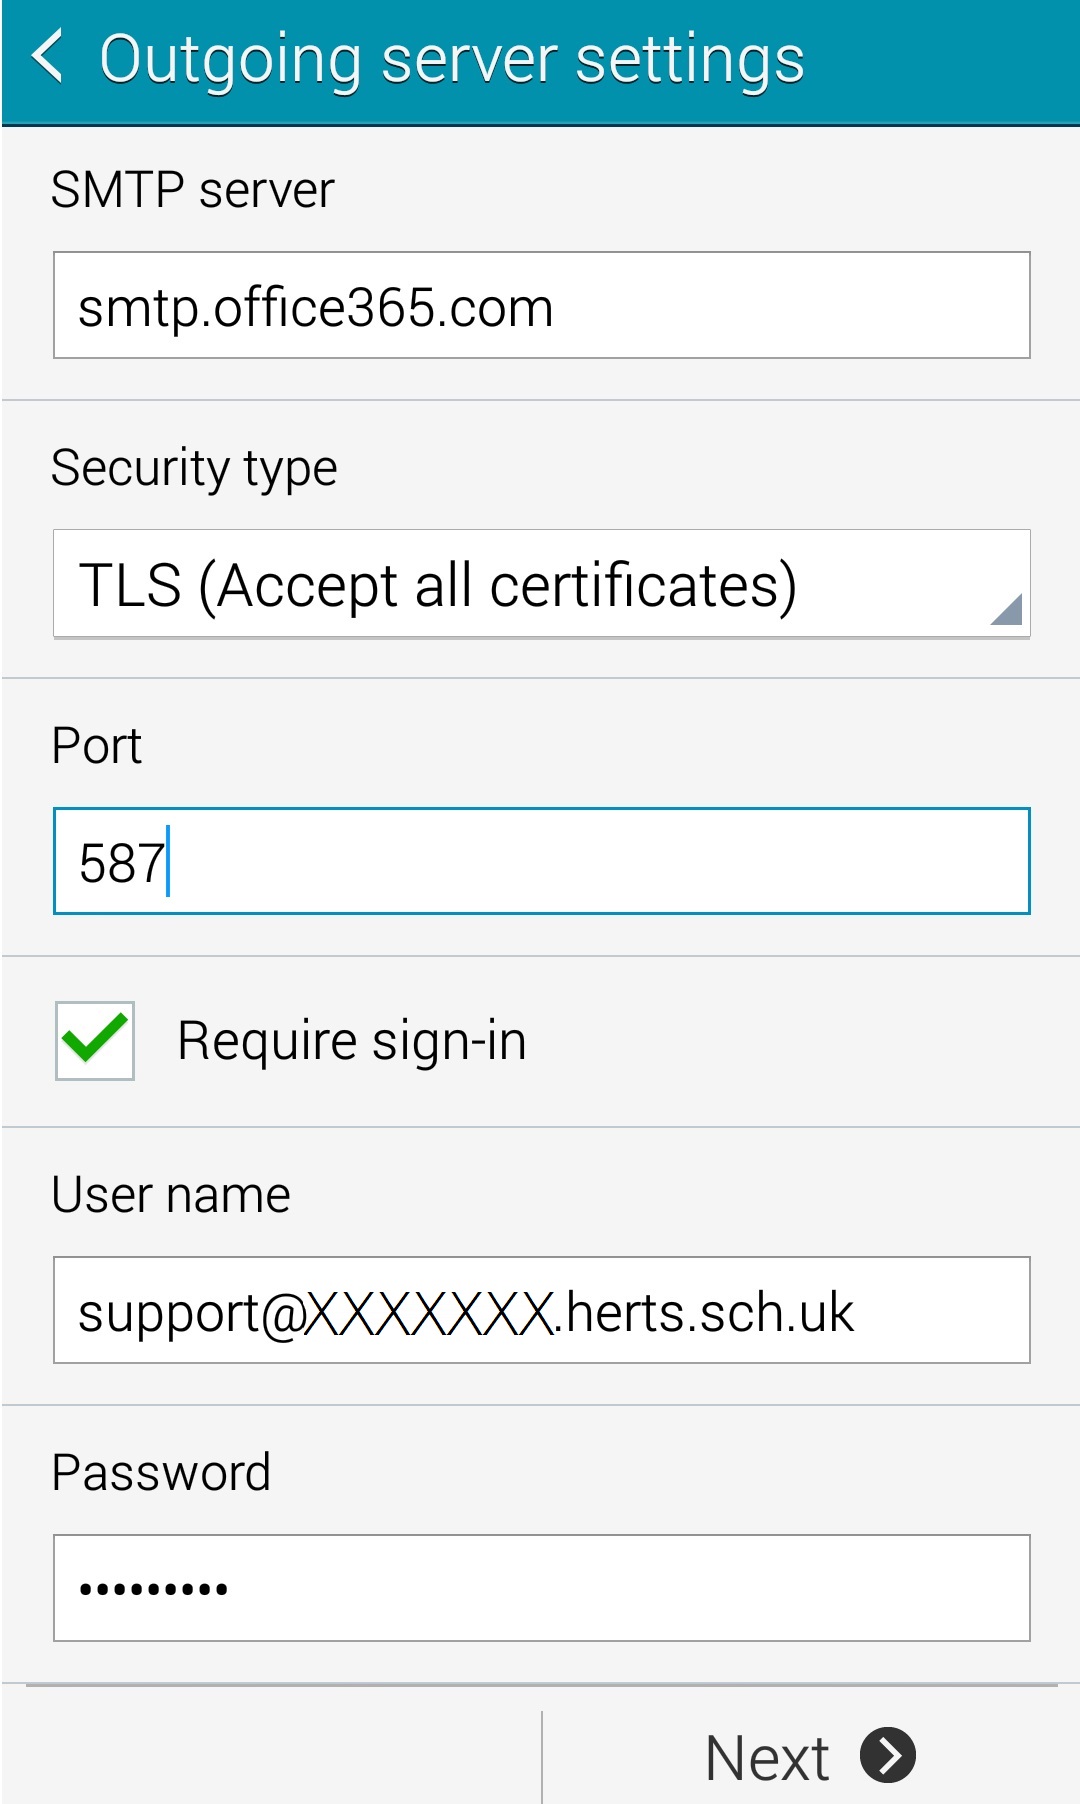
Outgoing Server Settings
SMTP server: outlook.office365.com
Security type: TLS (Accept all certifcates)
Port: 587
The “Username” and “Password” fields should be filled in using your email credentials. Once completed, tap “Next” in the bottom right corner.
NOTE: If you get a “handshake failed” error after putting in the settings above, use the security type “STARTTLS” on the outgoing server settings, with port “587”.
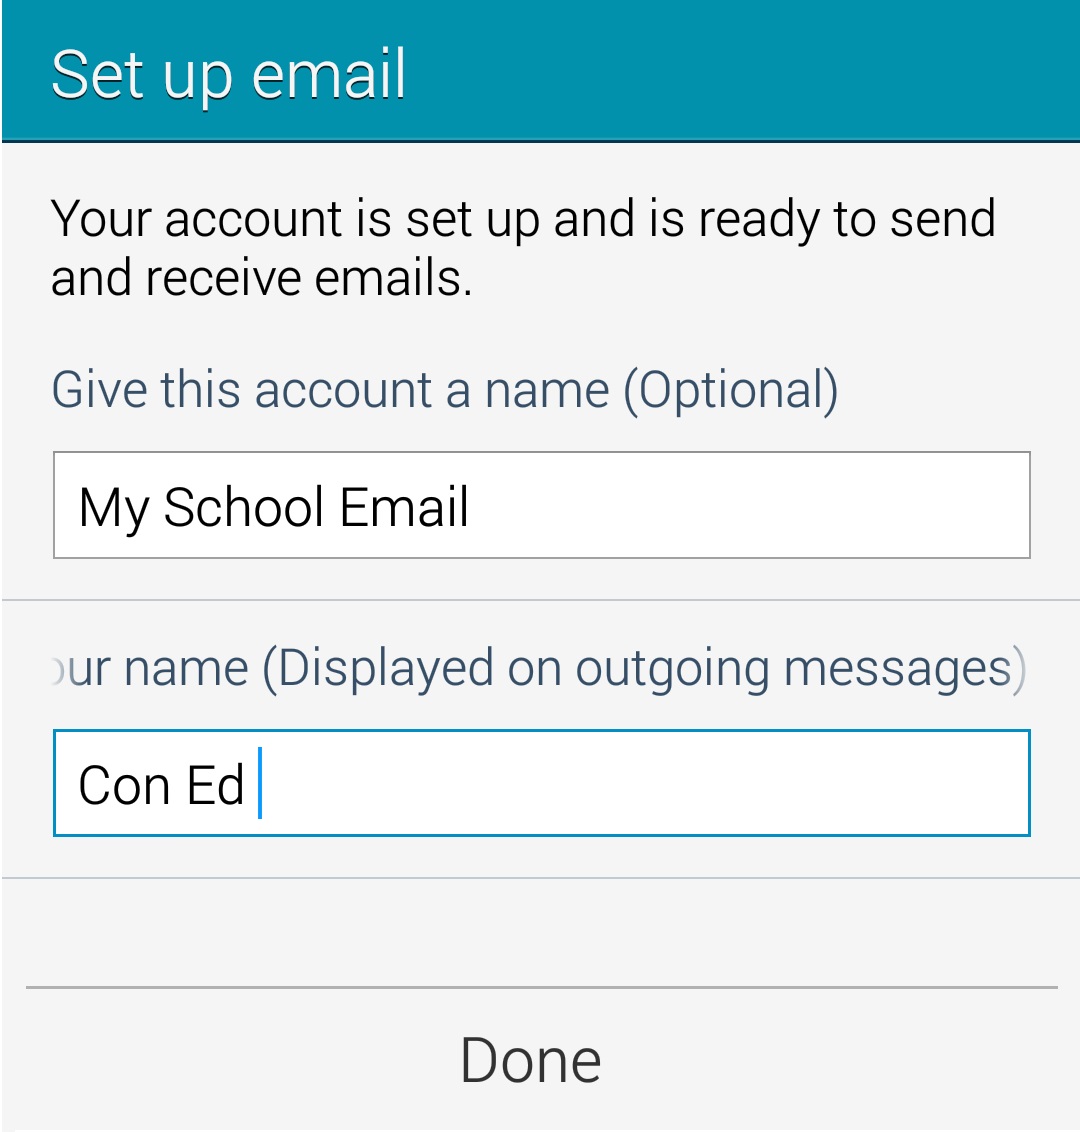
8) If everything has been entered correctly, the account should get verified after a few seconds and you will be presented with the screen to select your desired sync interval and frequency. Tap “Next” and finally give your email account a suitable name such as “My school email” and the name you wish to be displayed for sent emails – Tap “Done” and now your Office365 email is setup on your Android device.