
NOTE: This guide is only applicable to Windows XP, Vista, 7 and 8. Windows 10 instructions will be uploaded shortly.
VPN is a system that allows a user to connect to their organisation’s network from an external location. Essentially, it’s like running a really long network cable from the school back to your house – everything is encrypted making it safe and secure for use.
If you are using VPN from a school laptop, then the chances are that we have already deployed the VPN client to your machine. In which case, follow this guide from step 4. If you are going to use VPN from a personal Windows device, then instructions for installation is as below:
1) To install VPN on a personal device, first we need determine the type of system you have. Click Start > Computer > C drive (Local Disk).
- If you see “Program Files” folder, you have an x86 system
- If you see “Program Files” AND “Program Files (x86), you have an x64 system.
2) Once you have determined the type of system you have, choose and download the appropriate installation file below:
3) Once downloaded, right-click and extract the folder to any location. Navigate to the location where the folder has been extracted to, open the “vpnclient_setup” installation file. Accept all default settings. After the installation is complete restart your machine.
4) Once the machine is restarted, open the VPN client (click Start > All Programs > Cisco Systems VPN Client > VPN ).

5) Click Import. Now browse for the School VPN file which we have made available to you. If this has not been provided, please get in touch in the usual way.
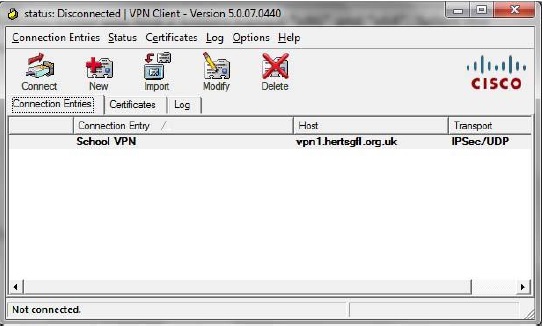
6) If you see School VPN listed in the client, it is now ready to use.
Exactly how you will now access your school documents will differ from school to school – ask us to find out the method adopted by your school.